Self-hosting your own DNS service can be both highly impactful and quite challenging. In my experience, AdGuard Home emerged as the optimal solution for this purpose.
AdGuard Home offers secure DNS filtering, customizable configurations, and access to various DNS blacklists to help reduce internet clutter and enhance privacy.
DNS plays a critical role in networking, enabling communication between devices and guiding how traffic is routed and directed across the internet. Given the importance of reliable DNS resolution, I prioritized implementing redundancy to ensure continuous availability.
To achieve this, I set up two instances of AdGuard Home – one functioning as the primary DNS server and the other as a failover or load balancer. This setup provides resilience against server outages.
Additionally, I desired local DNS resolution for internal network entries. Although configuring this was somewhat complex, after some experimentation, I discovered an effective solution.
Since I utilize pfSense as my firewall/router, I configured the upstream DNS providers within its interface to use Cloudflare. For each network interface, I set the DHCP DNS servers to point to my AdGuard Home servers. Furthermore, I configured pfSense as the upstream DNS provider for both AdGuard instances.
This configuration ensures that client devices continue to benefit from AdGuard’s filtering capabilities, while all DNS queries are routed through pfSense for added control and redundancy.
Category: Posts
How to Set Up Redundant DNS with Adguard Home and pfSense for Secure Network Management
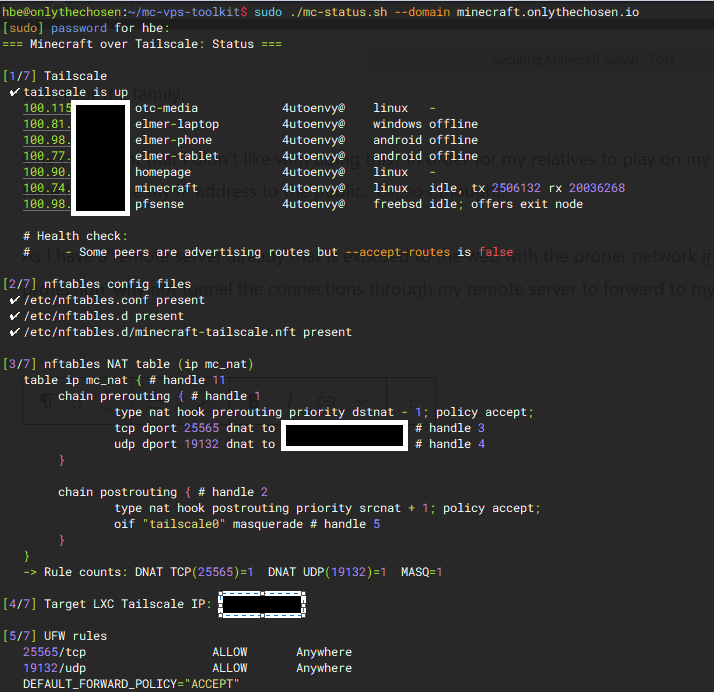
How to Host a Secure Minecraft Server on Debian 12 Using Tailscale for Family Gaming
Although I don’t play Minecraft often, I find myself returning to it from time to time. Since my wife, children, and relatives enjoy the game, I initially thought about purchasing a Realm. However, I realized it would be more cost-effective and customizable to host my own server. So, I set up a Debian 12 (XLC), installed the necessary components like Tailscale, and launched a dedicated Minecraft server for my family.
One challenge I faced was allowing my relatives to connect to my server without exposing my public IP address. Initially, I thought this would require directly opening my network to the outside world. But then I had a different idea: since I already run a remote server that’s properly secured and connected to the internet, why not tunnel the game connections through it to forward them securely to my home? This approach worked perfectly. It not only kept my network protected but also allowed me to develop a custom toolkit for managing and testing different configurations and outputs more efficiently.
Monitor Your Home Lab Services with Uptime Kuma for Maximum Uptime Efficiency
Monitoring uptime isn’t just about knowing if a service is online; it’s about gaining insights into performance, response times, and potential issues before they become critical. Uptime Kuma offers a user-friendly interface that allows me to set custom checks, receive notifications for outages, and view detailed logs. This proactive approach helps me maintain a reliable environment, ensuring my home lab runs smoothly and minimizing downtime. Whether I’m checking a web server, a database, or an external API, Uptime Kuma keeps me informed and in control.
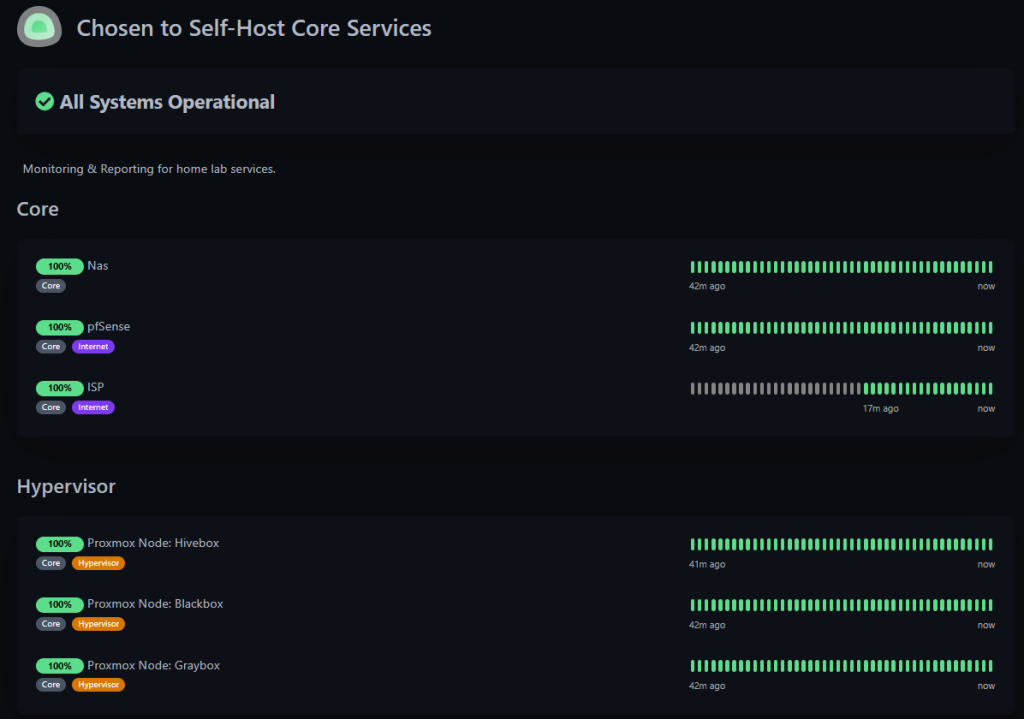
I use a visual status dashboard at https://uptime.onlythechosen.io/status/services for quick, real-time updates – green means healthy, yellow warns, and red signals outages.
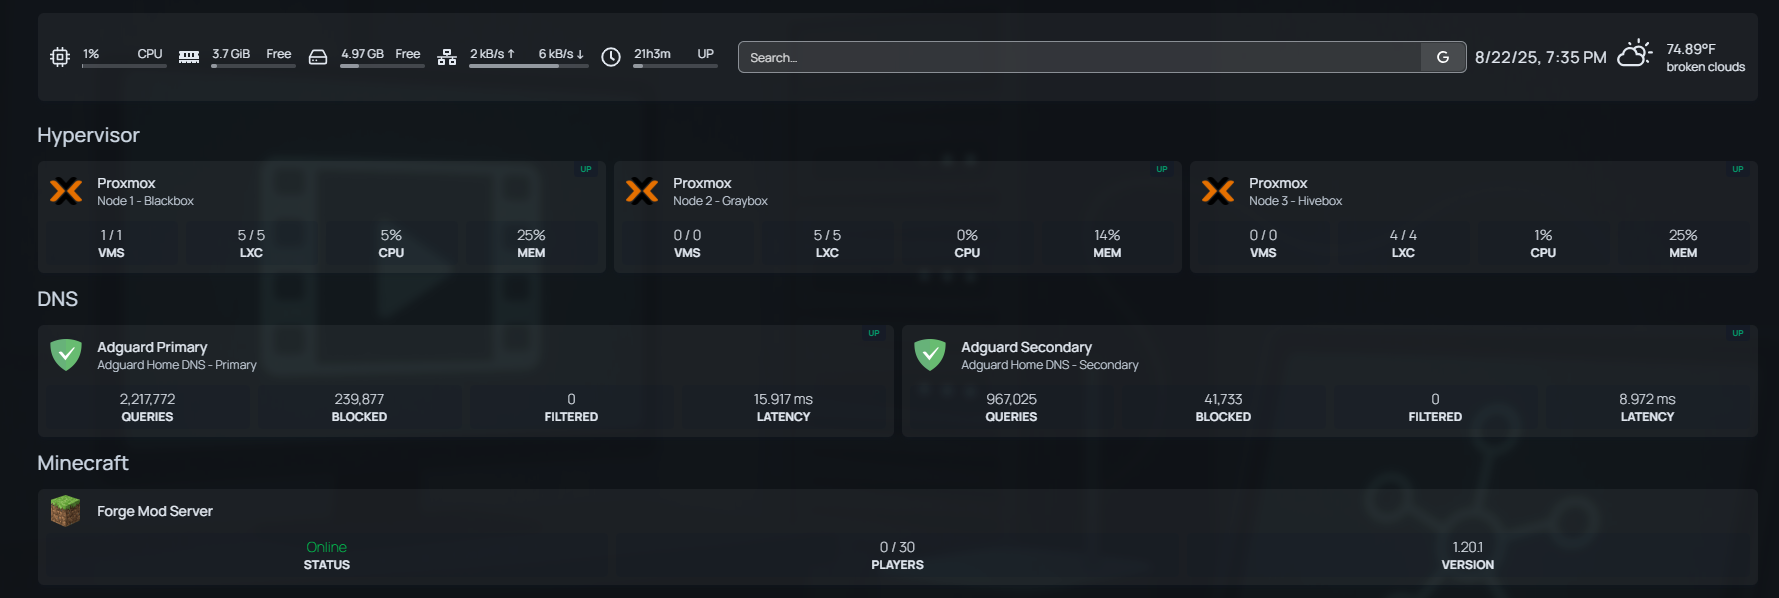
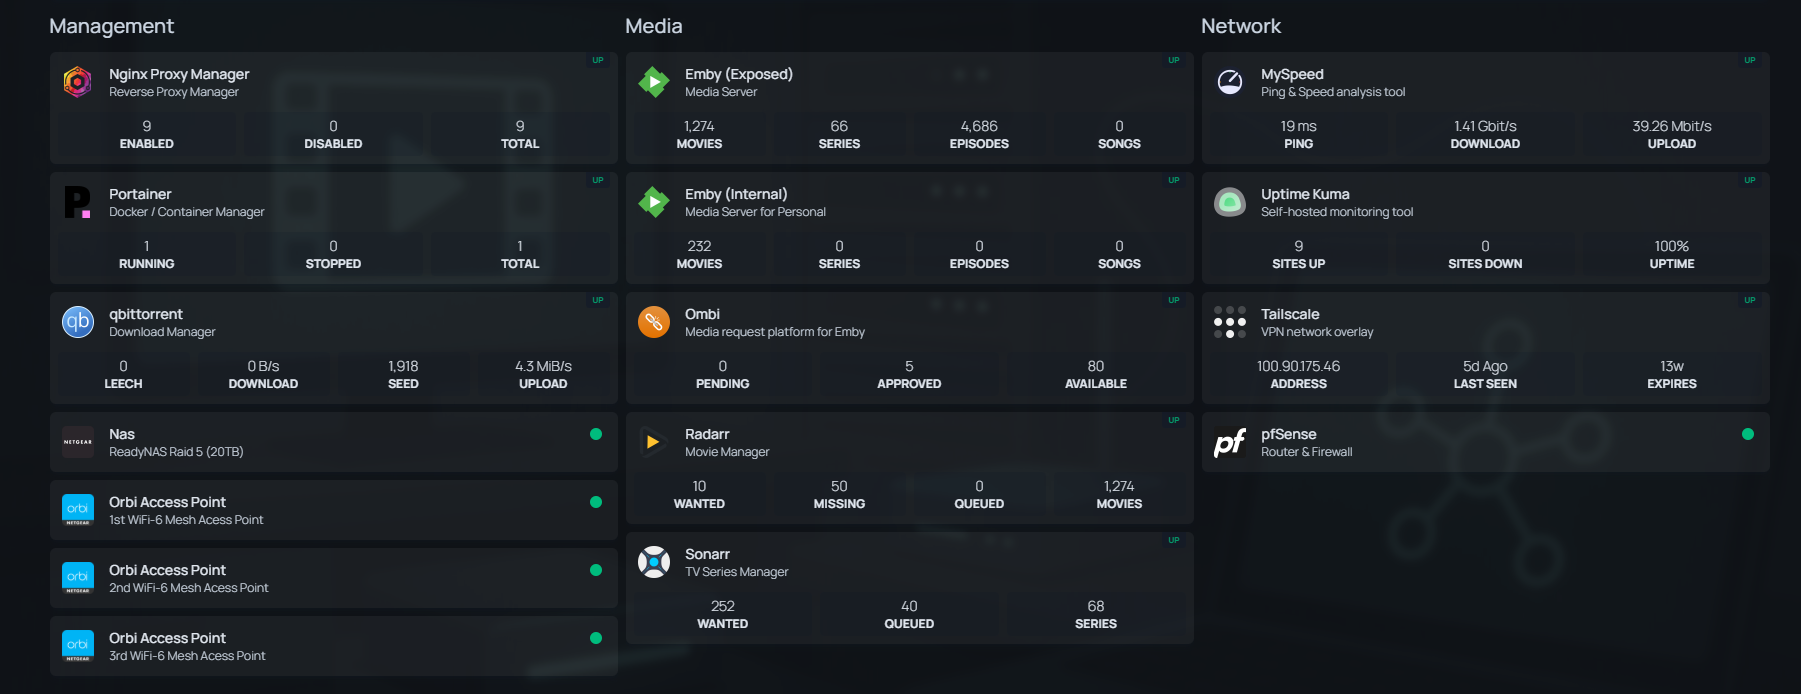
Best Home Lab Dashboard: Upgrading from Flame to Homepage for a Modern, Minimalist Interface
What a remarkable upgrade from Flame to Homepage! Don’t get me wrong—when I first started my home lab journey, I was genuinely satisfied with Flame’s simplicity. Fast forward a few years, and while I still value straightforwardness, I also yearned for a modern touch. I took a quick plunge into Homepage, and I couldn’t be more pleased. It allowed me to craft a sleek, minimalist dashboard that integrates effortlessly with all my different services. If you’re searching for a dashboard solution for your home lab, I highly recommend giving Homepage a try.

Challenges and Best Practices for Migrating WordPress from Docker to LXC Containers
Initially, I assumed that since both Docker and LXC are containerization solutions, the transition would be a seamless switch. After all, Docker manages containers at the application level, while LXC offers a more lightweight, system-level virtualization. With that in mind, I prepared my environment, exported the Docker container, and attempted to import it into an LXC container. However, I quickly ran into a series of unexpected issues, configuration mismatches, network inconsistencies, and filesystem permissions that didn’t translate directly. It became clear that this wasn’t just a simple copy-paste job; migrating a WordPress site involved more nuanced adjustments, particularly around the web server configuration, persistent storage, and database connectivity. Ultimately, I had to carefully reconfigure the LXC environment, manually set up the necessary services, and restore the data from backups to ensure everything functioned smoothly.
To my future self, configuration values go at the TOP of the configuration file, not at the bottom..
// Force SSL for Admin
define( ‘FORCE_SSL_ADMIN’, true );
// in some setups HTTP_X_FORWARDED_PROTO might contain
// a comma-separated list e.g. http,https
// so check for https existence
if( strpos( $_SERVER[‘HTTP_X_FORWARDED_PROTO’], ‘https’) !== false )
$_SERVER[‘HTTPS’] = ‘on’;
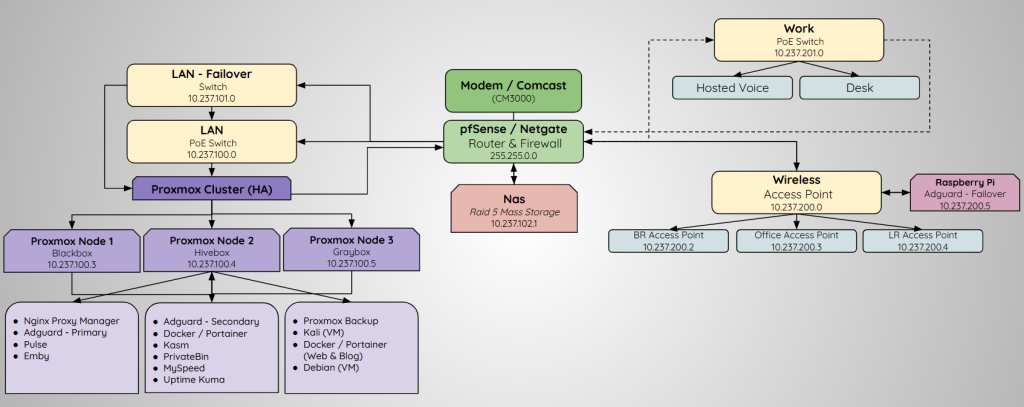
Home lab overview
Quick post to share a high level overview of my home lab layout.
https://docs.google.com/drawings/d/1edkk9tstF6FDbQl-luDv3iIpy2xfr1SPBG-PmCU7UeY/edit?pli=1